Old Patio, New Stone: Extending a Weathered Garden Without a Visible Join
There's a particular kind of phone call we get most springs. Someone laid a patio a decade ago, loved it, and now wants another two or three metres out into the lawn. The stone, of course, is discontinued. The joints have gone that soft grey-green. And the owner is quietly panicking that the whole thing is going to end up looking like a patchwork quilt.
It rarely does. But it takes a bit of thought, and it takes a willingness to stop chasing an exact match that probably doesn't exist.
The Perfect Match Is a Myth — and That's Fine
Here's the thing nobody tells you when you buy paving: even if you found the identical batch number from the identical quarry, the new stone would not match the old. Ten years of British weather puts a film on paving that no factory can replicate. Sun bleaches it, rain darkens it, algae settles into the pores, and frost opens up the surface just enough to change how it catches the light. That patina is the whole point — it's why old York stone flags sell for more than new ones.
So the goal isn't a seamless match. It's a convincing blend. Aim for "that looks like it's always been there" rather than "that looks like it was cut from the same block".
Start With the Paper Trail
Before you buy anything, dig out the original invoice if you can. Failing that, the name of the contractor, the year, or a photo from when it was new. Manufacturers keep ranges going for a surprisingly long time; what's often described as "discontinued" is really "discontinued in that particular colourway". A quick call to the technical line with a batch code and a photo will usually tell you whether a close cousin still exists.
Order a sample. Then do the thing most people skip: view it next to the existing patio, not in the kitchen. Wet it. Look at it in the flat light of a cloudy afternoon, because that's the light you'll see it in for most of the year. A stone that looks warm and honeyed under the showroom lights can go distinctly grey against a weathered buff patio in November.
When the Range Has Genuinely Gone
This is where it gets interesting. Reclaimed yards are worth a morning — old council paving, salvaged sandstone flags, reclaimed setts. You won't match, but you'll often find something with the right character, and character is what you're actually buying.
A second option, and one we use a lot: stop trying to blend and make the change deliberate. Choose a companion stone — same thickness, similar format, deliberately different tone or texture — and introduce it as a band, a border or a defined new zone. A band of darker setts between old and new does two jobs: it hides the transition and it looks like someone planned it, which they did.
One word of warning. Avoid pairing materials with wildly different porosity. Limestone butted up against dense porcelain will weather at completely different rates, and within two winters the join will look wrong even if it was laid perfectly.
Read the Existing Bond Before You Buy
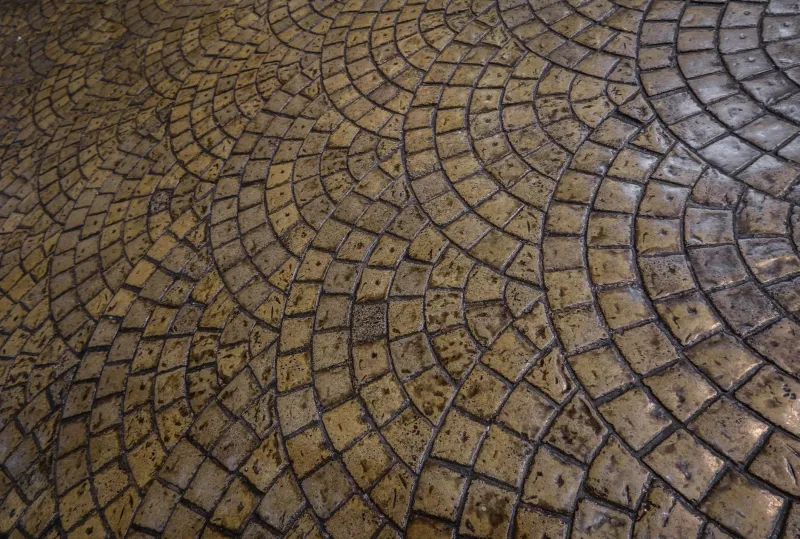
Take a careful look at how the original was laid. Is it stretcher bond running away from the house? Stack bond? Random coursing with mixed unit sizes? Measure the joint width with a tape, not by eye — 10mm and 12mm sound identical and look entirely different across a patio.
If you can replicate the bond, do. If you can't, don't fake it. A change of pattern with a clear edge between the two is honest and it reads well. A half-hearted attempt to copy a random layout, badly, is the thing that makes extensions look tacked on.
Where to Put the Seam
The instinct is to hide the join in the middle of the new patio. Resist it. A hidden join in an open field of paving draws the eye precisely because it's in an odd place.
Put it where a break already exists: along the line of the house, at a change of level, at the edge of a step, or under a threshold. If you can't find a natural break, make one — a soldier course, a drainage channel, a gravel strip. And build in a movement joint if the new section is on a different sub-base from the old, because differential settlement is the single most common reason extensions crack at the join.
Blend, Don't Segregate
This is the trick that separates a good extension from a patch. Don't lay all the new stone in one block adjacent to all the old. Once the new section is down, lift a handful of old units near the join and swap them into the new field. Then swap a few new units back into the old. Suddenly there's no boundary, because the boundary has been deliberately blurred.
If you're jointing with sand, use the same kiln-dried sand throughout. If the original was pointed with mortar, point the new section with mortar of the same mix and colour. Resin jointing is trickier to match to old mortar, so if the existing joints are mortar, it's often better to repoint the whole lot in resin a year later than to have two joint types side by side.
Let the Weather Do the Rest
New stone will look bright for a season. There's no way around it. Efflorescence will probably appear — that chalky white bloom is salts coming to the surface, and it fades on its own. Algae will start to settle into the new joints within a year, which is exactly what you want, odd as it sounds.
Don't seal the new section separately. Wait at least twelve months, let everything settle, and seal the whole patio in one go. And resist the urge to jet-wash the new stone back to showroom brightness while the old stays mature — that's what produces the two-tone effect you were trying to avoid.
The Honest Answer
Every so often, extending isn't the right call. If the existing patio is only fifteen square metres and you're doubling it, the old section will look like the extension, not the other way round. And if the original is already rocking, cracking or holding water, adding to it just gives you more of the same problem.
But for a sound patio that's simply aged, an extension done with a bit of care will settle in within two winters and stop registering as new at all. The join doesn't have to be invisible. It just has to look like someone thought about it.